Default Printer Keeps Changing in Windows 10
In earlier versions of Windows, the default printer was selected based on the Network to which the computer is connected. This feature is no longer available in Windows 10, which now tends to set default printer based on the most recently used printer at a particular location. However, you can easily prevent the default printer from switching on your computer by preventing Windows 10 from managing the Default Printer on your computer.
1. Do Not Allow Windows to Manage Default Printer
Go to Settings > Devices.
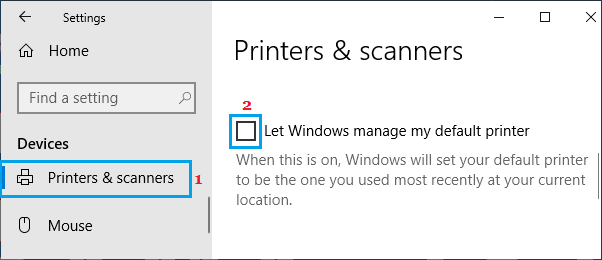
On the next screen, select Printers & Scanners in the left-pane. In the right-pane, scroll down and uncheck Let Windows manage my default printer option.
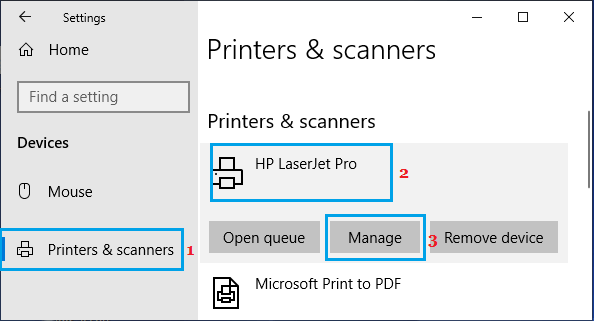
Scroll up on the same screen, select the Printer that you want to set as default and click on Manage.
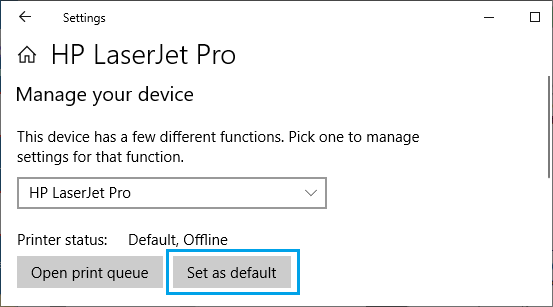
On the next screen, click on Set as Default button.
After this, you should no longer find the default printer changing on your computer.
2. Use Registry to Prevent Default Printer From Switching
Another way to prevent the default printer from switching on your computer is by using the Registry Editor. You can use this method, if you are unable to use the first method or if you find the default printer changing, even after using the first method.
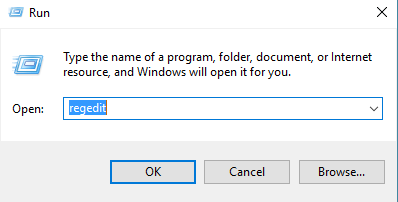
Open the Run Command on your computer.
In the Run Command window, type regedit and click on OK.
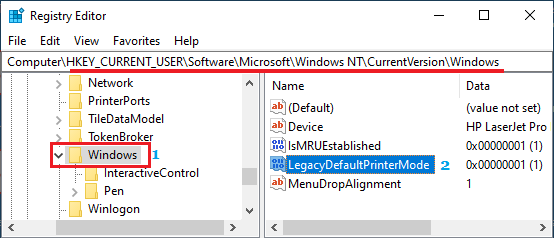
On Registry Editor screen, navigate to HKEY_CURRENT_USER\SOFTWARE\Microsoft\Windows NT\CurrentVersion\Windows.
Click on Windows Folder in the left-pane. In right-pane, double-click on LegacyDefaultPrinterMode key.
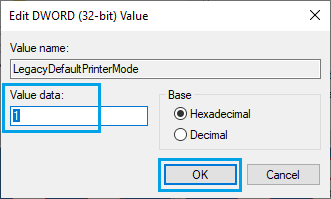
On the pop-up, change value of LegacyDefaultPrinterMode from default 0 to 1.
Click on OK to save this change on your computer. This should prevent Windows 10 from changing the default printer on your computer.
How to Fix Printer Offline Error in Windows 10 How to Make Printer Online in Windows 10
