Realtek Audio Console is an interface that helps set and modify the effects of audio devices and all related audio settings. It lets you adjust the configuration of the sound system as well as individual speakers/headsets. But, if the audio driver is damaged or out of date, then several audio errors or problems can come up. Therefore, it is crucial to keep the respective drivers up-to-date. The next section helps you update the outdated audio drivers for Realtek audio console in order to find and fix connectivity issues.
How to Download and Update Drivers for Realtek Audio Console on Windows PC
You can install the latest driver updates either manually or automatically. In this section, we are going to explain both approaches, so all you need to do is just make walk through the list and find the most suitable method for you. Now, without further ado, let’s get started!
Method 1: Manual Methods to Download Realtek Audio Console
Following are the different manual methods that you can use for performing Realtek audio console downloads.
1. Run Windows Update to Install Realtek Audio Console Driver Update
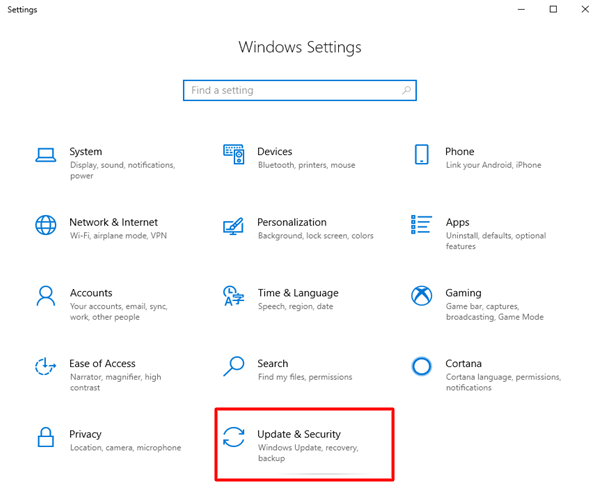
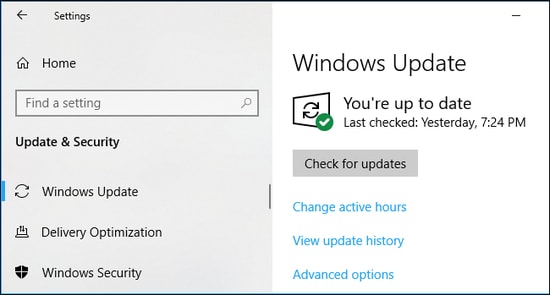
Step 1: On your keyboard, altogether press Windows and I keys to summon Windows Settings on your screen. Step 2: Find and click on Update and Security. Step 3: Locate the Windows Update tab from the left menu pane and click on it. Step 4: Next, click on Check for Updates. Sit back and wait for the available updates to download and install completely. Once done, reboot your system to apply the new updates. Also Read: How to Download Realtek Audio Driver for Windows 11,10
2. Update Realtek Audio Console Driver via Device Manager
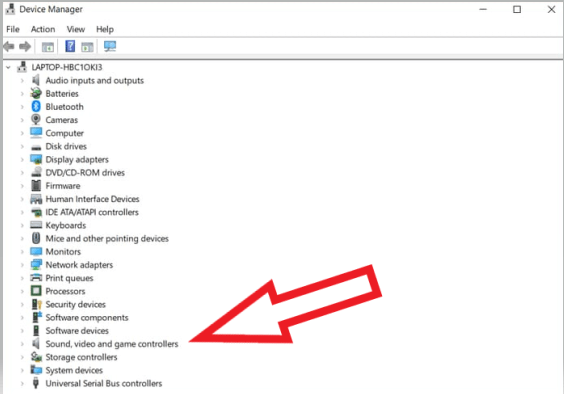
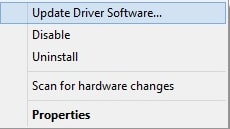
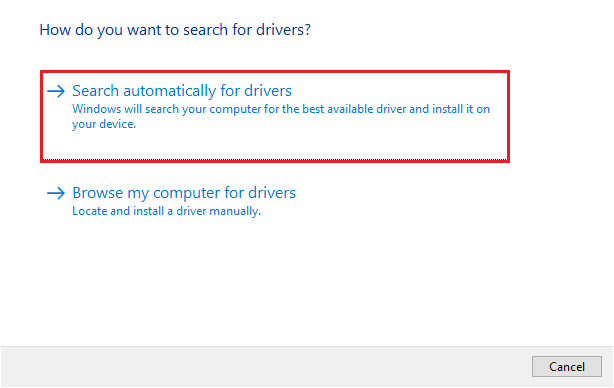
Step 1: Press Windows + X keys together and click on Device Manager to open it. Step 2: Find and expand the Sound, video, and game controllers section by clicking double on it. Step 3: Next, locate and click right on the Realtek audio console driver. Step 4: Choose Update Driver Software… from the available options. Step 5: From the next option, click on the option saying Search Automatically for Updated Driver Software. Now, follow the on-screen instructions to complete the process and successfully install the Realtek audio console driver on Windows 11, 10, 8, and 7. Once everything is done, restart your system.
3. Get Latest Realtek Audio Console Driver Update From the Manufacturer’s Official Site
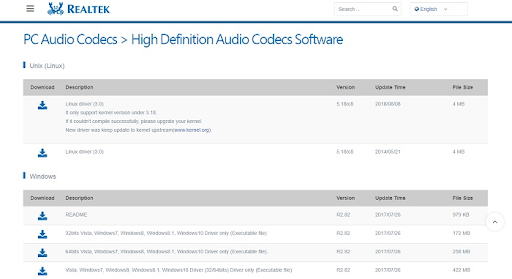
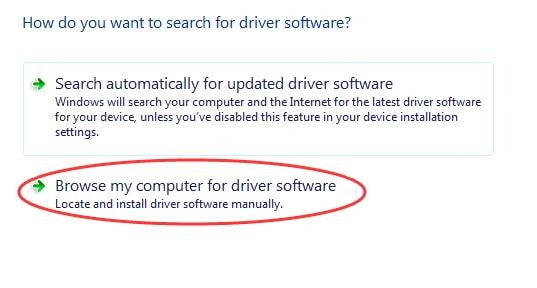
Step 1: Go to the official support page of Realtek and hover over the PC audio codecs section. Step 2: Now, look for a compatible Realtek audio console driver and download it. Step 3: Then, open Device Manager to proceed and double click on Sound, video, and game controllers to expand its category. Step 4: Locate and right-click Realtek audio console. After that, choose Update Driver Software from the available options. Step 5: In the next window, choose the option that says Browse my computer for driver software. Step 6: Next, input the desired location of the downloaded driver file. Step 7: Lastly, implement the on-screen instructions to successfully install the executable file. Once done, reboot your computer system to apply the recently installed audio drivers. Also Read: How to Fix Realtek Audio Not Working in Windows 10,11
Method 2: Automatic Method For Realtek Audio Console Driver Update
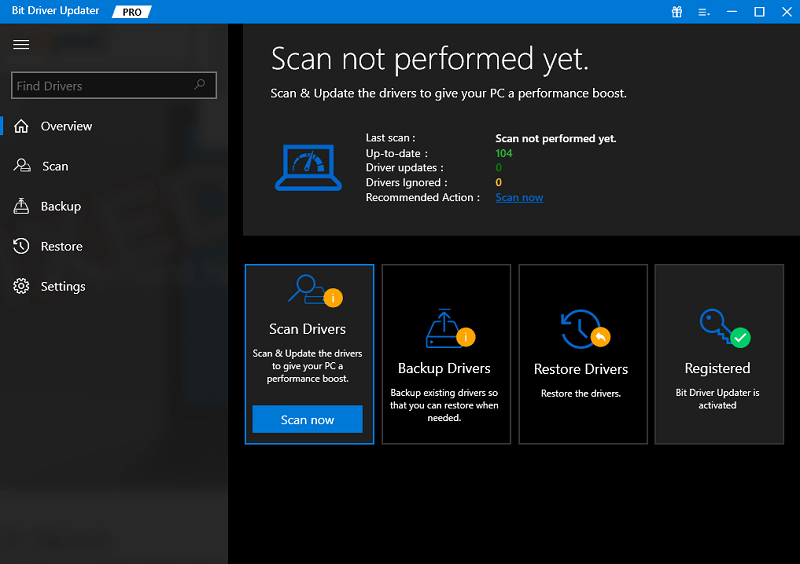
The aforementioned ways to perform Realtek Audio Console download on Windows 10/11/8/7 might not be a preferable option for all PC users. If you are a non-tech user with no time or required computer skills, then updating the outdated drivers automatically with the best free driver updater tool is the most convenient way for you. The Bit Driver Updater is one of the best driver-updating utility tools that can update all your PC drivers with just a few clicks of the mouse. Not only that, but the tool also comes with an auto backup and restore wizard that automatically creates a backup of older drivers before updating. It is a globally recognized software and is available in free as well as paid versions. However, the paid version comes with some extra features and advanced functionality. Moreover, the paid version offers 24/7 technical support and a full money-back guarantee but for a limited time. Now, without any further hustle, here is how to use Bit Driver Updater for performing Realtek Audio Console driver download and update. Step 1: Download Bit Driver Updater from the button below.
Step 2: Run the downloaded file and follow the setup wizard to complete the process. Step 3: Launch the software and click on Scan. Step 4: Wait for the scanning to be completed. Step 5: Once done, click on the Update All button and install the latest version of all PC drivers on your system. This will install all the available driver updates including Realtek Audio Console. However, this feature is available only for users with the paid version. Users with the free version can click on the Update Now button beside the driver you want to update. Once you are done, restart your PC and check to see if the Realtek Audio Console works fine on your computer. Also Read: Realtek HD Audio Manager Download for Windows 11/10 PC
Realtek Audio Console Driver Download & Update: DONE
That’s all! Using any of the above-mentioned methods you can quickly download the Realtek Audio Console driver on Windows 11, 10, or older versions. We hope you found this driver-installation guide helpful. Please feel free to drop your queries in the comments section below. For more tech-related updates, articles, and information, you can subscribe to our Newsletter and follow us on Facebook, Twitter, Instagram, and Pinterest.
