Frequent system crashes are an indication of hardware issues. Complications with computer peripherals can be attributed to outdated drivers. And, as many experts believe, one of the safest ways to fix them is through Device Manager. Hence, this article throws light on what is a Device Manager and how to use it to solve problems with a device. Without any further ado, let’s begin learning about the Device Manager with its meaning.
Definition of Device Manager
In simple terms, the Device Manager is a Control Panel utility that lets you have an organized view of all the peripheral devices connected to your computer. A few examples of these devices are keyboard, printer, mouse, hard drive, etc. The Device Manager neatly categorizes all the devices into various categories depending on their device type and other criteria. When any device, for example a printer, stops working, it is the job of the Device Manager to notify and help you fix it. To use the Device Manager, you can access it by following the directions given in the next section.
How to Find Device Manager
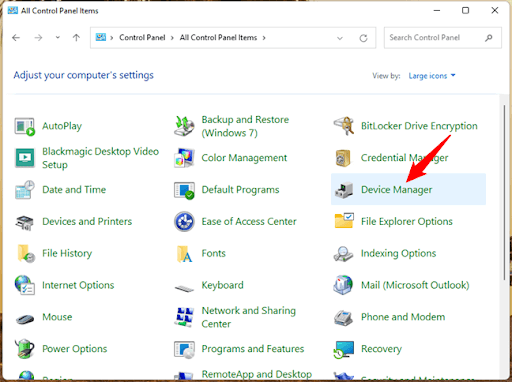
Accessing the Device Manager is quite a simple task. You may follow the below steps to open the Device Manager with ease.
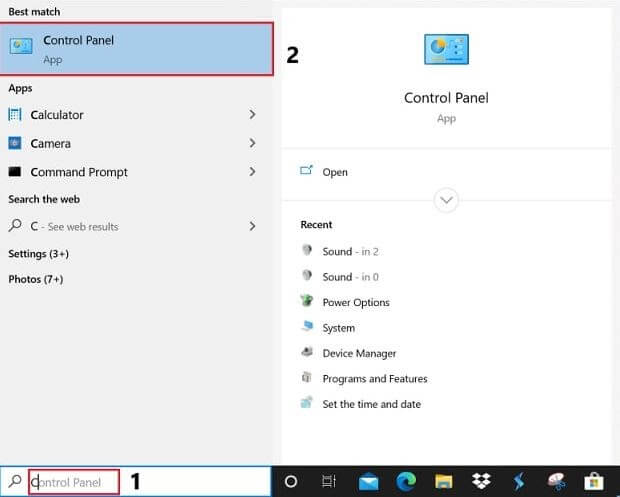
Search for the Control Panel on your computer and click on the first search result to open it.Change the view to Large icons. Choose Device Manager from the list of shortcuts that appear on your screen.
After opening the Device Manager, you can use it to fix hardware issues. Below are two ways you can use Device Manager to solve problems with a device.
How to Use Windows Device Manager for Troubleshooting
If any device is causing troubles, you can either disable it or manage it using the options available in the Device Manager. First, you need to identify the problematic device by following the steps shown below to do any of these.
Steps to Identify the Devices that Are Not Working Properly
Following are the steps you may implement to find the problem-causing device on your computer.
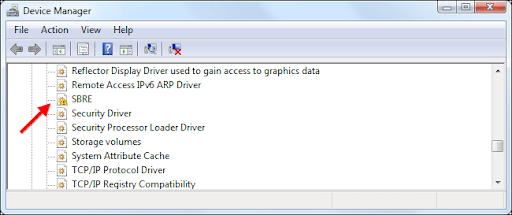
After launching the Device Manager, it displays all the devices connected to your system in well-organized categories, such as Imaging devices, Sound, video, and game controllers, Printers, etc. Expand each category one-by-one to find the device with a yellow exclamation mark. The yellow marked device is causing problems on your computer.
If you already know which device is troublesome, you can directly click on its category to view it. For example, if your display driver has stopped responding, you may click on the category of display adapters to find and fix the graphic driver.
Now, you may double-click the device with the yellow mark or the trouble-causing device to view its Properties.
After learning about the issues with the device, you may take the actions described below to solve the problems.
Disable the Device
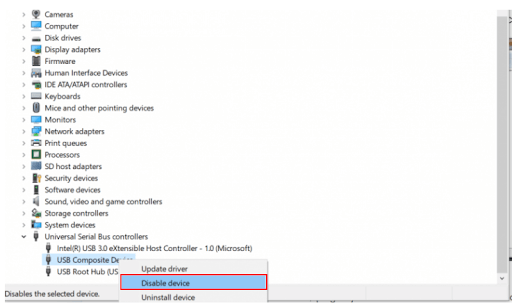
If a device is not working or has some other issues, you may choose to disable it through the Device Manager. Disabling the device is a good option when the device is no longer required or may pose some security risks to your computer. Following are the steps to disable any device via the Device Manager. Here, we are taking the USB port as an example, but the steps apply to all devices.
Launch the Device Manager and click on the category of device you wish to disable. In our example, we want to disable the USB port, hence, we click on the Universal Serial Bus Controllers.Right-click the device and select the Disable device option.Now, click Yes to proceed with disabling the device.Let the process complete.
If you do not want to disable the device, the Device Manager has some other driver management options you can use to solve the related problems.
Device Manager Options to Manage Drivers
After you double-click a device in the Device Manager, you get a Properties window with various options as described below.
Detail of the driver
Not exactly an option, but the Properties window displays driver details you may find useful.
Driver Update
The Device Manager also comes with an Update Driver option. To access this tool, you may right-click the device or go to the Driver tab in its Properties window. There are two ways to update drivers through the Device Manager, you can choose to “Search automatically for updated driver software” or select the “Browse my computer for driver software” option. If you search automatically for updated driver software, Windows finds, downloads, and installs the latest driver update on your computer. However, it may take a considerably long time to do it. The “Browse my computer for driver software” option works when you have a driver file saved on your computer (you may download the driver file from the device manufacturer’s website). Note: You can use the free driver updater software for Windows 11, 10, 8, and 7 to get the updated driver quickly
Driver RollBack
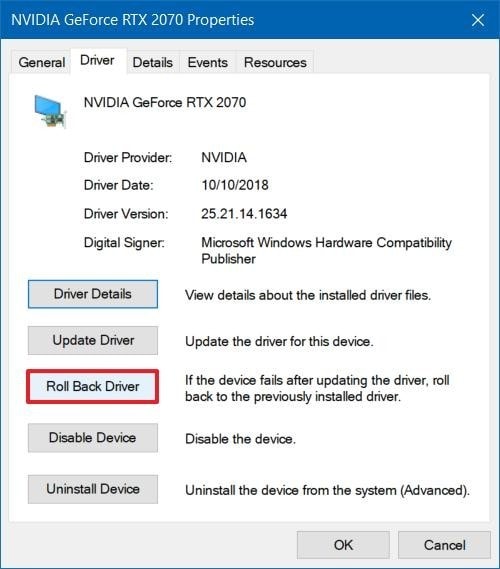
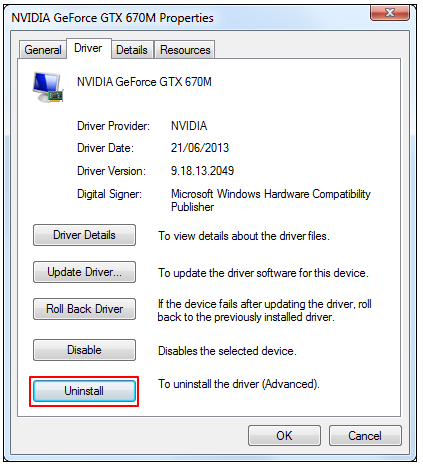
The Device Manager also boasts an option to use the previously installed driver if the updated driver is incompatible with your computer. To roll back the driver, you need to go to the device’s properties, travel to the Driver tab, click on the Roll Back Driver button, choose any reason for the rollback, and select OK.
Uninstall the driver
Uninstalling the driver is another option you have to get rid of driver problems. To uninstall a device, find and right-click it in the Device Manager, and select “Uninstall” from the available options. Alternatively, you can also follow the path hardware device’s properties>Driver Tab>Uninstall. Also Read: Get All Device Drivers For Your Windows PC
Summing Up
Above was how does the Device Manager work to fix common computer problems. We hope now you understand what a Device Manager is in Windows and how to use it for troubleshooting. If you have any questions or suggestions about this article, you may use the comments section to get in touch with us. Let’s now take your leave, we will return soon with another useful tech article. Meanwhile, you may look around this blog to immerse yourself in interesting tech articles.
![]()
